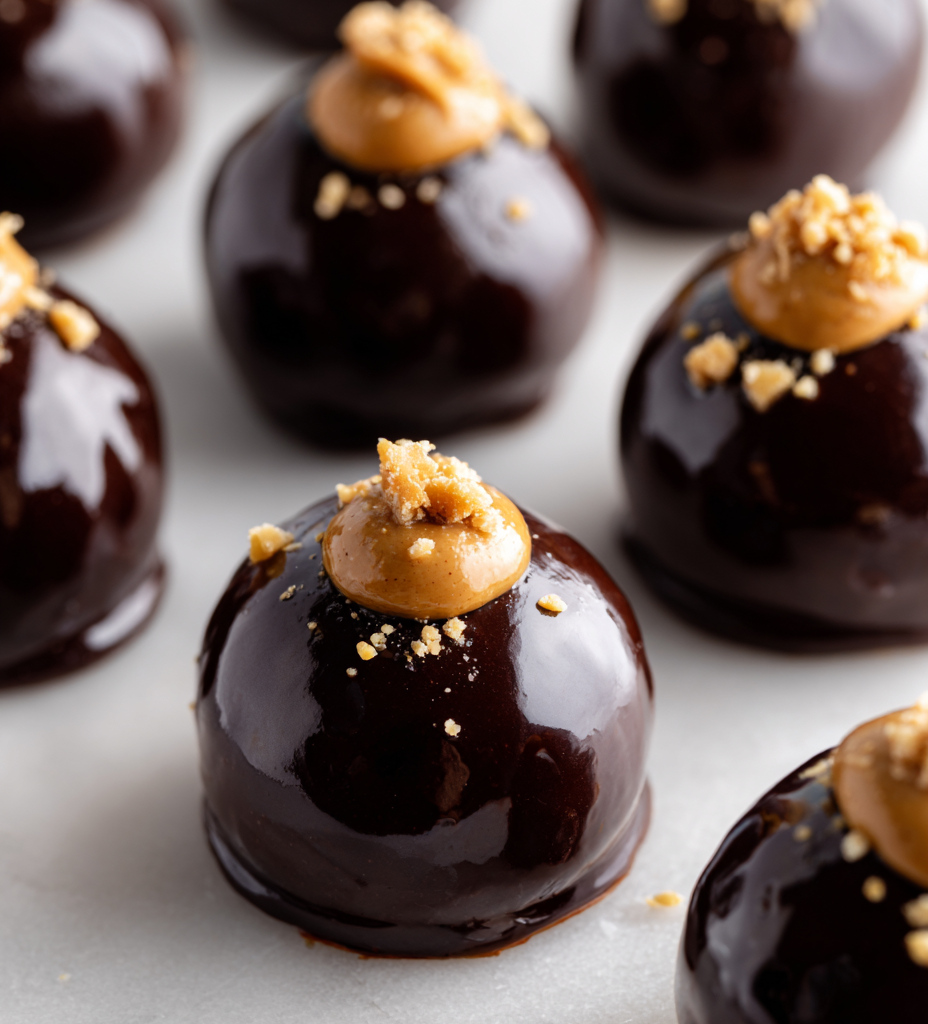

Making these chocolate peanut butter truffles feels like a messy, joyful throwback to childhood afternoons spent in the kitchen. There’s no need for perfect spheres—just smudged chocolate and peanut butter smears that remind you it’s okay to be a little rough around the edges. It’s the imperfect, slightly chaotic process that makes them feel personal, real, and utterly satisfying.
These treats aren’t about precision; they’re about embracing that slightly sticky, gooey mess and turning it into something rich and indulgent. Each bite offers a burst of creamy peanut butter, smooth chocolate, and a hint of salt—simple flavors that take me right back to weekend baking sessions with no agenda but to enjoy the process. It’s comfort food, unpolished but deeply satisfying.
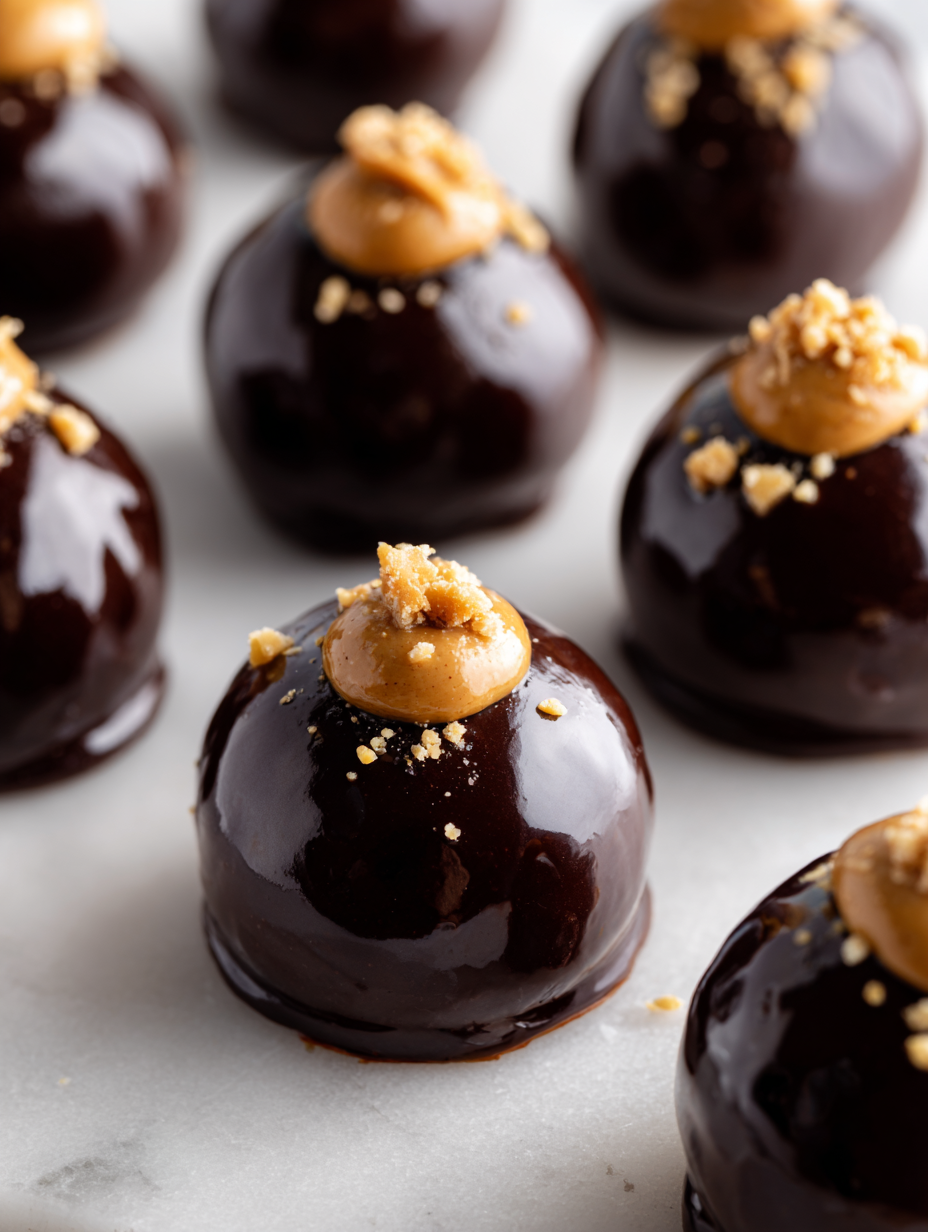
Focusing on the nostalgic comfort of childhood treats, this recipe elevates the classic chocolate peanut butter truffle by emphasizing the imperfect, messy joy of making them by hand—no perfect spheres here, just honest, slightly uneven bites of decadence that remind you of weekend kitchen chaos.
Messy, nostalgic indulgence
- Baking these takes me right back to my grandma’s kitchen, where messy fingers and giggles were the main ingredients.
- There’s a wild sense of relief in smashing the peanut butter into the chocolate—like letting go of perfection for pure joy.
- I love how each batch turns out slightly different—some with a gooey center, others more crumbly, but all comforting.
- Filling the house with the smell of melting chocolate and toasted peanuts always sparks a little nostalgia for weekend mornings.
- Making these reminds me that sometimes, the best treats are the imperfect ones—crumbly, messy, and completely satisfying.
Messy, nostalgic indulgence
Making these chocolate peanut butter truffles came from a moment of wanting to turn a simple pantry raid into something special. I was craving that messy, comforting joy of childhood treats but with a grown-up twist. The process is all about embracing imperfections—no perfect spheres, just rough-hewn bites of decadence that feel personal and real. It’s a reminder that sometimes, the best desserts are the ones made with love and a little chaos in the kitchen.
Chocolate Peanut Butter Truffles Trivia
- These truffles echo a mid-20th-century American confection trend, where homemade candy became a symbol of comfort and celebration.
- Peanut butter and chocolate pairing originated in the late 1800s, but it became wildly popular during the 1950s as a nostalgic treat.
- The rustic, imperfect style of these truffles is inspired by traditional handmade confections from small-town bakeries, emphasizing charm over perfection.
Ingredient breakdown: key components
- Peanut Butter: I love using a natural, slightly oily peanut butter for that rich, roasted flavor. You can swap in almond butter if you prefer a different nutty punch, but the peanut flavor really anchors these treats, and the oiliness helps with the texture.
- Dark Chocolate: I opt for a good-quality dark chocolate that melts smoothly and has a deep, slightly bitter edge. Milk chocolate will make the truffles sweeter, while white chocolate gives a different, creamy sweetness—experiment to match your mood.
- Butter: I use unsalted butter for a clean, rich base that helps everything meld together. If you’re avoiding dairy, coconut oil works but adds a faint coconut aroma—skip if you want pure peanut-chocolate harmony.
- Powdered Sugar: I keep it simple with standard powdered sugar to sweeten and smooth out the peanut butter. If you want less sweetness, reduce it slightly, but know it helps the mixture set better for shaping.
- Optional Add-ins: I sometimes toss in a pinch of sea salt or a dash of vanilla for extra flavor. You could swap vanilla for a splash of bourbon or coffee extract to add a grown-up twist—just a tiny amount.
- Coating: I coat these in extra melted chocolate or crushed peanuts for texture. For a different crunch, try shredded coconut or crushed graham crackers—whatever adds a bit of that satisfying bite.
- Chilling: I chill the mixture until firm, about 30 minutes in the fridge. If it’s too soft, the truffles won’t hold shape—be patient, and it’ll be worth the wait.
Spotlight on key ingredients
Powdered Sugar: I keep it simple with standard powdered sugar to sweeten and smooth out the peanut butter. If you want less sweetness, reduce it slightly, but know it helps the mixture set better for shaping.:
- Peanut Butter: I love using a natural, slightly oily peanut butter for that rich, roasted flavor. You can swap in almond butter if you prefer a different nutty punch, but the peanut flavor really anchors these treats, and the oiliness helps with the texture.
- Dark Chocolate: I opt for a good-quality dark chocolate that melts smoothly and has a deep, slightly bitter edge. Milk chocolate will make the truffles sweeter, while white chocolate gives a different, creamy sweetness—experiment to match your mood.
- Butter: I use unsalted butter for a clean, rich base that helps everything meld together. If you’re avoiding dairy, coconut oil works but adds a faint coconut aroma—skip if you want pure peanut-chocolate harmony.
Notes for ingredient swaps
- Dairy-Free: Swap regular butter for coconut oil or vegan butter. Expect a slightly different richness and a subtle coconut aroma.
- Peanut Butter: Use almond or cashew butter for a milder nutty flavor. Natural, runny types work best for easy mixing.
- Chocolate: Dark chocolate can be replaced with milk or white chocolate. Keep in mind, milk and white will make the truffles sweeter and creamier.
- Powdered Sugar: If you prefer less sweetness, reduce the powdered sugar slightly or try honey powder for a different sweetness profile.
- Add-ins: Substitute crushed peanuts with toasted shredded coconut, crushed graham crackers, or mini sprinkles for varied textures and flavors.
- Coatings: Instead of melted chocolate, try rolling in cacao powder, crushed cookies, or finely chopped nuts for a different crunch.
- Chilling: If short on time, freeze the mixture for 15 minutes—just be careful not to freeze it too hard, or shaping gets tricky.
Equipment & Tools
- Small mixing bowl: Mix peanut butter and sugar smoothly.
- Microwave-safe bowl: Melt chocolate gently without scorching.
- Spatula: Fold ingredients and scrape sides.
- Baking sheet: Hold the finished truffles as they set.
- Fork or toothpick: Dipping and coating the truffles in chocolate.
Step-by-step guide to truffles
- Gather your equipment: a small mixing bowl, a microwave-safe bowl, a spatula, a baking sheet, and a fork or toothpick for dipping.
- In the mixing bowl, combine 1 cup of peanut butter (smooth or chunky based on preference) with 1/2 cup of powdered sugar. Mix until smooth and slightly sticky—this is where chaos meets comfort.
- In the microwave-safe bowl, melt 8 oz of dark chocolate in 30-second bursts, stirring after each, until smooth and glossy. Be careful not to overheat; chocolate burns quickly.
- Pour the melted chocolate into the peanut butter mixture. Fold together with the spatula until fully incorporated and slightly thickened, about 1-2 minutes. The smell should be rich, with toasted peanut notes.
- Chill the mixture in the fridge for about 30 minutes, or until it’s firm enough to scoop but still pliable. If it gets too hard, let it sit at room temp for a few minutes.
- Using a small scoop or a spoon, portion out about 1 tablespoon of the mixture. Roll gently between your palms into rough, uneven balls—embrace the imperfections.
- Dip each ball into the melted chocolate using the fork or toothpick, letting excess drip off. Place on the prepared baking sheet. For variety, sprinkle crushed peanuts or sea salt on top before the chocolate sets.
- Optional: For a crunchier coating, roll the dipped truffles in crushed nuts or shredded coconut immediately after dipping. Chill again for about 15 minutes to set.
- Once coated and set, transfer the truffles to a plate or container. Let rest at room temperature or refrigerate if you prefer a firmer bite.
Let the dipped truffles rest at room temperature for 10 minutes or refrigerate for 15 minutes until the chocolate is set. Serve slightly chilled or at room temp for the best texture. Don’t forget to store in an airtight container to keep them fresh.
How to Know It’s Done
- Chocolate coating: should be shiny and firm, with no sticky spots.
- Shape: rough, uneven, but holds together without cracking or cracking when touched.
- Texture: filling should be creamy but not too soft—firm enough to bite into cleanly.
Chocolate Peanut Butter Truffles
Ingredients
Equipment
Method
- In a small mixing bowl, combine the peanut butter and powdered sugar. Mix with a spatula until the mixture is smooth, slightly sticky, and well integrated. The mixture should be easy to scoop but hold together when shaped.
- Break the dark chocolate into smaller pieces and place them in a microwave-safe bowl. Microwave in 30-second bursts, stirring each time, until the chocolate is melted and glossy. Be gentle to prevent burning.
- Pour the melted chocolate into the peanut butter mixture. Add the butter and fold everything together with a spatula until fully combined and smooth. The aroma should be rich, with hints of roasted peanuts and chocolate.
- Cover the mixture with plastic wrap and chill in the fridge for about 30 minutes, or until it firms up enough to scoop and shape without sticking excessively.
- Using a teaspoon or small scoop, portion out about a tablespoon of the mixture. Gently roll between your palms into rough, uneven balls—embrace the imperfect, messy look that adds to their charm.
- Dip each truffle into the melted chocolate, using a fork or toothpick to coat it completely. Let the excess chocolate drip off, then place the coated truffle onto a baking sheet lined with parchment paper. For extra flavor, sprinkle with sea salt or crushed peanuts immediately after coating.
- Optional: Roll some of the coated truffles in crushed peanuts or shredded coconut for added texture. Chill the tray in the fridge for another 15 minutes so the chocolate sets firm and shiny.
- Once the chocolate is set, transfer the truffles to a plate or an airtight container. Let them rest at room temperature or refrigerate until ready to serve. Enjoy these messy, nostalgic bites anytime you crave a decadent treat.
Notes
Pro tips for perfect truffles
- & Melty: Use high-quality chocolate for a glossy, smooth coating that sets beautifully.
- Temperature Check: Keep melted chocolate warm but not hot; it drips smoothly without seizing.
- Texture Test: The peanut butter mixture should be firm but pliable—if it crumbles, chill a bit longer.
- Quick Dip: Use a fork or toothpick to coat the truffles evenly—let excess chocolate drip off to prevent drips.
- Chill smart: Rest the coated truffles in the fridge until the chocolate is just set—about 15 minutes—to avoid melting.
- Mess-Friendly: Keep a damp cloth nearby to wipe any chocolate smudges from your hands or workspace.
- Flavor Boost: Sprinkle flaky sea salt or crushed nuts immediately after dipping for added crunch and flavor.
Common mistakes and how to fix them
- FORGOT to temper chocolate → Use low heat; avoid burning, stir until smooth.
- DUMPED ingredients too quickly → Add gradually, mix well for even texture.
- OVER-TORCHED the chocolate → Remove early; residual heat melts it perfectly.
- MISSED chilling time → Chill at least 30 minutes for firm, workable mixture.
Quick fixes and pantry swaps
- If chocolate seizes, splash in a few drops of vegetable oil and stir gently.
- When mixture is too soft, chill for 10-minute intervals until firm enough to roll.
- DUMPED too much powdered sugar? Add a splash of milk to loosen the mixture.
- Over-melted chocolate? Patch with a small piece of un-melted chocolate and stir until smooth.
- Shield fragile truffles with a gentle dusting of cocoa powder if they crack during coating.
Prep, store, and reheat tips
- Prepare the peanut butter and chocolate mixture in advance; it firms up nicely in the fridge, making shaping easier later.
- Store the finished truffles in an airtight container in the fridge for up to a week; the cool keeps the chocolate shiny and prevents melting.
- If freezing, place in a single layer on a lined tray, then transfer to a sealed container; they’ll last up to a month. Thaw at room temperature for best texture.
- Reheat slightly in the refrigerator or at room temperature to soften just enough for a smoother bite; avoid melting the coating completely.
- Let the truffles sit at room temperature for about 10 minutes before serving to enhance flavor and soften the chocolate coating’s snap.
Top questions about chocolate peanut butter truffles
1. Can I use smooth or chunky peanut butter?
Use natural peanut butter for a richer, roasted flavor, but processed peanut butter works too—just expect a smoother, less oily texture.
2. Can I substitute dark chocolate with milk or white chocolate?
Yes, swapping dark chocolate for milk or white chocolate is fine, but it will change the flavor profile and sweetness.
3. How do I know when the mixture is ready to shape?
Chill the mixture until firm but not hard, around 30 minutes in the fridge; it should be scoopable but hold shape.
4. Why does my chocolate coating crack and how do I fix it?
If the chocolate coating cracks, gently re-melt with a splash of oil or warm it slightly to loosen the consistency.
5. How long can I keep the truffles in the fridge or freezer?
Store in an airtight container in the fridge for up to a week, or freeze for up to a month; bring to room temp before serving.
6. How do I shape the truffles without them falling apart?
Use a small spoon or your hands to shape the mixture; don’t worry about perfect spheres—rustic is good enough.
7. What if my melted chocolate becomes grainy or seizes?
Chocolate seizing happens if it gets too hot or moisture gets in; fix by adding a few drops of vegetable oil and stirring.
8. Can I add extra toppings or flavors?
Add a pinch of sea salt or crushed nuts immediately after coating for extra flavor and crunch.
9. How do I get a shiny, smooth chocolate coating?
Chill the coated truffles until the chocolate is just set—about 15 minutes in the fridge—for a shiny, firm finish.
10. Can I customize the flavor with add-ins?
Yes, adding a splash of vanilla or a dash of espresso powder can enhance the flavor and add depth.
These truffles are a little messy, a little nostalgic, and a whole lot of satisfying. They remind me that sometimes the imperfect bites are the most memorable, especially when they carry a whiff of roasted peanut and melted chocolate. Making them is a reminder to embrace the chaos in the kitchen and enjoy every gooey, crunchy moment.
In the end, it’s not about perfection but about the joy of creating something comforting and real. Whether you share them with friends or keep them all to yourself, these treats bring a bit of that messy, sweet magic into everyday life.

Hi there! I’m Isabella, the founder and curious foodie behind Crumb Detective. I’ve always believed that every dish has a story to tell — from the secret family recipes passed down through generations to the bold experiments happening in kitchens around the world.